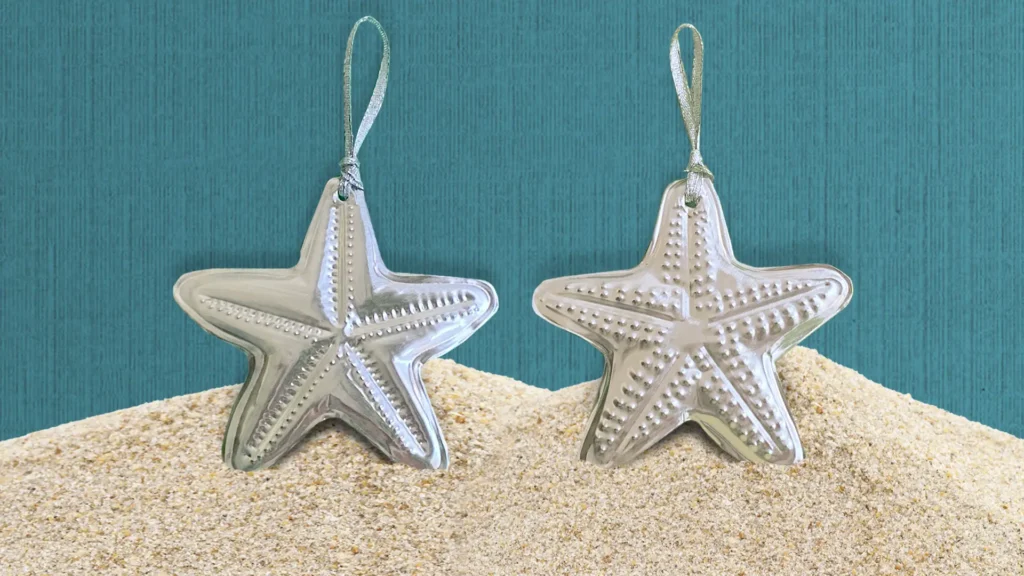
Shell Yeah, My Tree’s Still Up.
How to Make Metal Embossed Seashells and Starfish Ornaments
Yep, you read that right-I keep a tree in my living room year-round, and instead of packing it away after December, I just keep dressing it up with whatever makes me smile. Birds, flowers, seashells, starfish—you name it, it finds a branch. Think of it as a revolving gallery of my whims.
Today I’m showing you how to make your own shiny DIY ornaments using metal embossing. Don’t worry—it sounds way fancier than it is (spoiler: you’ll be using a ballpoint pen). The end result? Handmade ornaments that catch the light beautifully and bring a little beachy, earthy magic into your space, no matter the season.

Supplies you’ll need:
- Sea ornament templates (starfish + seashells)
- Scissors
- Masking tape
- Craft foam sheet (9” x 12”)
- Ballpoint pen
- Aluminum craft metal foil roll (36-gauge)
- Embossing tools (get creative: a ball stylus, a wooden clay tool, even an orange stick from your nail kit works!)
- Ribbon (about ⅛-inch wide, cut into 5-inch strips—one per ornament)
Safety note: aluminum edges can be sharp. Pop on a pair of gloves while you’re working to save your hands and keep things clean.
Step 1: Prep your template
Print out your seashell and starfish templates. Rough cut around each shape, leaving about a half-inch border of plain paper.
Step 2: Cut your craft metal
Snip a piece of aluminum foil from the roll that’s the same size as your craft foam sheet. Place it on top of the foam—this creates your “cushion” for embossing.
Step 3: Tape & trace
Tape the paper templates onto your craft metal. With your trusty ballpoint pen, trace the outlines of the shapes. Don’t press too hard—you want lines, not holes. (Flip it over as you go to check your progress.)
Step 4: Add the fun details
Now comes the satisfying part: embossing! Use whichever tool feels good in your hand and press in lines, dots, and textures to bring your seashells and starfish to life. Pro tip: flip the metal over to press designs in the opposite direction for extra depth.
Step 5: Make a hole for hanging
Each template has a little circle at the top—trace it, then press through with your pen tip to create a hanging hole. Wiggle the pen gently to widen it just enough for your ribbon.
Step 6: Cut them out
Carefully cut around each ornament shape. (Reminder: those edges can be sharp, so take your time and protect your hands!)
Step 7: Ribbon & hang
Thread your 5-inch ribbon through the hole, tie a knot, and ta-da—you’ve got a shiny, ocean-inspired ornament ready to sparkle on your tree.
And there you have it—your very own set of handmade, nature-inspired ornaments. I love how they shimmer in the light and bring a touch of seaside magic indoors. The best part? They look just as good hanging with flower garlands and bird ornaments in spring as they do alongside twinkle lights in December.